Saturday, December 24, 2016

Sorolla (a gift) and where I am now on the wall


Here is a beautiful show of paintings of Sorolla which I'm sending as a little Christmas token.

I've stopped for the holidays and my vacation cruise and pushed to leave it in some sort of respectable shape for the customers who come during the Christmas school vacation.  The underpainting, except for the bottom area of the dunes which will have rocks and maybe Martians, is almost done and the UV paint is done on the right end of this section.  I had to put the staging away so some highest points are not completed. I am anxious to return and paint UV on the dragon and paint the flames he's breathing out.  Painting flames with transparent paints is what makes flames look so good, but this UV paint is not transparent which presents some serious challenges.
Progress as of end of December 2016

Wednesday, December 14, 2016

Working from right to left on long wall

This week I did a couple more primer coats on the dragon's fire and primed the first couple of things along this long wall.  I wanted to start to paint the UV paint on the dragon's fire but realized just in time that if I did that then the only thing that would show up with the blacklights on during a session this weekend would be the dragon's fire but you wouldn't see where it was coming from, so in order to paint the flames I first need to paint the dragon.  In light of this, I decided to start on the right and move towards the left finishing approximately 30 feet at a time.
Meanwhile Marc worked on the new area for video games and birthdays.  He had to grind the cement where the bench had been (remember from my previous blog that we tore down the bench).  There was a lot of work involved, even putting down the new urethane coating was harder than usual due to it being thicker and harder to apply.  There are UV chips sprinkled on top.
Bench was were the blue is since that section needed two coats of urethane.
This is the finished beautiful new floor with the UV chips in it.
When I came in the next morning after the grinding, there was tons of very fine dust all over the main floor (and everything else most likely) I had to dry mop it twice and wet mop it finally to get it up.
Here you can see the cement dust where I didn't clean it up.
Primer coat is the white in this area.
First thing this morning (Wednesday) I unloaded my carts and reorganized everything.  Over the past 9 months I've worked with these carts and everything was helter skelter.  I managed to return some paints and materials to storage since I'm on the home stretch now and can thin out my inventory.
Beginning to paint with blacklight (UV) paint on the planet.  In this photo both the
white lights and the UV lights are on.

In this photo only the blacklights are on.  My camera doesn't take the best pictures.

Thursday, December 8, 2016

Last wall - this week's work

Sunday night
Met with Marc and figured out the positioning of the video screen and the size. 

Monday
Resized the video screen after painting the first coat of primer because it was smaller than ideal.
The ratio must be 9:15 and now the new size is somewhere around 10 x 20.  So I measured, taped, put on two coats of primer. and did some positioning of the graphic design on the wall.

Tuesday
Put one final paint coat on the screen, but it needs another coat.
Put up more underpainting and designing of the first section of the wall mural.
There is a large planet with a small planet at it's edge and an orange circular explosion thing.
The shape of the hills below have been changed somewhat.

Final coats on the video screen and more underpainting of the mural design.
Wednesday
Put the final coat on the screen, so 2 primer coats and 2 top coats.
Did more redesigning of the first section of the wall mural and more underpainting.
Washed a section of the first end wall that I had painted last spring where a bench had been and is now removed.  The section under the bench is now revealed and 80' was scrubbed, washed, and painted.
More touch-up paint in that area.
Some of this original design will be covered by large video redemption game machines in another month or so.
After bench was removed, wall was washed

Wall was painted purple.  Floor in  this area will have blue urethane floor with green UV chips.

Thursday, December 1, 2016

Ready again for the last long wall.

Before I start, I'm looking into vinyl signs for those skater logos that I can glue to the outside wall.  Still trying to figure that one out.

It is settled that one large video screen will be close to the middle of that wall.
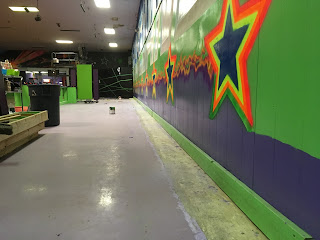
View of the long wall now.  Three things are on it, a space station, a castle, and a dragon.
I am glad about that because two screens would take up most of the space (you can see part of one of the screens to the far right of this photo) and make any real sense of a space design fairly impossible to achieve.  This center screen will cover the beloved castle (which looks like a dot on that wall on this picture) that has been a element of that wall through a few other renovations, but I'm going to move it and use it again!  The decision of where to put it took a while, but at least it can be squeezed in.
I did a quick loose drawing and colored it in with markers, not the best for actual colors or values, but it's something I can go by.

  • The dragon, whose wing looks like a purple smoke stack, is breathing fire
  • To the left of the screen you can make out some lightning
  • Beside the lightning is the castle
  • The old space station is visible at the far left.  It blocks out the planets I'm trying to feature.

There is a space station left over from the previous design that I was thinking of keeping, but now I'm not that sure.

So I traced the present castle and will transfer that drawing to the new location.

Friday, November 25, 2016

Plan B, another version of the last wall

Surprisingly ideas come to you, you just have to let them happen.  I'm formulating a new plan for that last wall that will include some elements of the previous plan and include the two video screens.  It's a good thing that I love a challenge.
Besides that last long wall on the inside of the building, I'm trying to figure out how to make more of those skating icon figures for the outside end wall that faces the new parking lot.  I did some drawings of them, and made some measurements and decided that the only way to get anything done now (since the weather is too cold to paint outside) is to paint them on wood and attach them to the building.  I'm up for it, but maybe Marc is not.  It would be an additional $500 in wood alone.  I guess we'll, as they say, take it as it comes.  In other words, first things first.  Redoing the end wall with the big mirror ball and video screens along with the long wall with the new video screens is next on the agenda.

Wednesday, November 23, 2016

New wall DELAY and revision!

What timing!  Just when I’m geared up and ready to proceed with the long wall and all the wonderful space themed artwork I have been planning for about a year, everything is going to be changed around.
We will be getting in lots of video games and other attractions.  We have been planning on the video games and even though they will be put in front of some of the artwork, it will still look ok and maybe after they are installed, I can add something around them.
We had not been planning to add large inflatables that will need to be on the main floor for maybe half of the time we are open to the public.  These are almost to the ceiling and will take up the entire width of the floor and use up about 20 feet of skating surface from the end wall towards the middle.  When they are inflated, you wouldn’t see the wall much but you would otherwise.
It has not been decided on which end exactly they will be installed.  Most likely the end where the large video screens are now.  That would mean that the video screens will move to the wall that I was just starting to paint, and where the video screens are now (an area that has been painted with the large mirror ball and cheering crowd scene) will need to be redone in some way.
The good news is that I hadn’t finished the new space wall, the bad news is that it would have been pretty darn nice!

Tuesday, November 22, 2016

Guild of Boston Artists panel discussion

I attended a panel discussion Saturday, Nov. 19th at the Guild of Boston Artists on Newbury Street where T.M. Nicholas, Stapleton Kearns and David P. Curtis were scheduled to speak.  David P.  Curtis was unable to attend because of a bad cold.
Stapleton Kearns is an artist that I studied with only a week or two ago in CT for a 3-day weekend workshop.  T.M. Nicholas I had not met before although I am very familiar with his work and the work of his father, Tom Nicholas (who gave me some advice when I was doing a plein air paint day in Gloucester).  I have known and studied with David Curtis for many years.  All three of these artists are leaders in the Boston School of art, in other words a definite style of New England painting and live or have lived in Rockport .  The room was packed and had standing room only, and I was lucky enough to be there early and got a seat on a sofa which turned out to be very very nice.  It is a pleasure to listen to two guys, who are very accomplished artists, sit and talk as if you were in the living room listening to their conversation.
I was lucky again by getting a parking space on Newbury Street about 3 blocks away from the Guild with the max allowed time of 2 hours.  First I pulled into a public parking place but when I saw that it would be $40 for 2 hours or more, I continued looking and four spaces down the street I found a spot for $2.50.  I had to leave before the event was over, and I was the very first one to leave.  I felt bad about that, but I think people in Boston have a different mentality about this type of thing as they realize there is always a parking situation.
I really enjoyed listing to TM and look forward to talking with him sometime.  There are not a lot of people that I would feel comfortable, lets say, sitting or having meal with, but I believe I would be able to have a nice conversation with TM, he seems like a regular guy and I liked what he had to say about the art of oil painting.

Monday, November 21, 2016

Dragon Scales and Skater Logo preparation

Here is a photo of the dragon with the scales on his tail.
Friday I bought some boards to make a stencil to hopefully paint something outside the front door maybe Saturday morning while the sun in on that side of the building.  It's too bad that the cold weather is moving in but it is that time of the year.  I am hoping to get some kind of signage or icon on the north side of the building, the side that faces the now open lot that will become the parking lot. That side of the building can be seen by all the traffic that passes over the bridge from Haverhill to Bradford.  When Spring comes we will do something permanent but I'm hoping we can do something to carry us over until then.

Sunday, November 20, 2016

Skater Icon/Logo--rush job

On Saturday, Nov.  19th, I got up early as I was very motivated to paint a skater logo or icon on the outside of the Skateland building.
There are very few warm days left to paint outside.  I wish I could paint the new visible end wall side of the building since the vacant lot next door has been cleared leaving a beautiful view of the building.
The problem is that it is the north side and the cement blocks feel like 32 degrees.  I’ll try to find out how to paint on a cold surface, but don’t hold out much hope.
Since I was planning to go into Boston at 1:00 and the rink would be opening then as well, I literally raced to get this done in the approximately 4-hour window I had.  I started from scratch
although I had done the drawing the night before on a piece of paper.
So first I put together some foamboards and cardboards large enough to fit the drawing on to make it into a stencil.

Then I drew the image onto a piece of plastic, some recycled scrap, I’m big on recycling.  Then I projected that onto the boards, drew around the inside of the marking, took it down and cut along the drawing line with a razor knife–pretty hard to do with a dull blade and in a hurry, fortified the stencil as best I could with tape and dragged it outside.


 First I had to make a run to the local hardware store as I needed exterior spray primer and top coat–great stuff that dried in 10 minutes per coat.  I mixed up some black paint for the outline.  Taped the stencil to the outside wall with masking tape and did 2 primer coats and 2 finish coats and the outline.  First I did one outline and realized it needed a thicker outline so went around the first outline.  I finished one minute before the manager arrived and in plenty of time to head into Boston!!!

Wednesday, November 16, 2016

Wings and Tails!

Yup, the dragon has his first coat of paint.  Actually I'm calling it the 3-D dragon because he looks like hes coming to get you!  The wing was very difficult to do with the angles and the fact that it's on the ceiling.  It wasn't so hard painting on the ceiling, but what you think you want to do when you are on the ground, gets lost when you climb up on the staging, you can't figure out where you are, especially during the drawing stages.  The most fun part was putting the scales on his tail!


First coat?  Well, I'm thinking and hoping that I'll be able to overcoat with the UV paint.  Usually the UV paint has to go over white, but this would require that I put, for example, green UV over green regular paint.

Saturday, November 12, 2016

Went to Portrait Group today.

Portrait Group
I haven't been to portrait group for well over a year.  Since I always have my eye on what to do next, I have to regain my skills with regular oil painting.  I felt a little like a duck out of water last week when I attended the Stapleton Kearns workshop, realizing that I haven't worked with regular paint brushes much since I've been working on the mural.  Incidentally, while I'm painting the mural and have the opportunity to use a brush or a roller, it makes me smile.
I have been doing a few 6x6" paintings that I'll put up on DPW soon, hopefully in time for people shopping for Christmas.
Well, it felt pretty nice to be there today, very many of the people who were there before are still there, and I think I did better than I expected to do.  I have to reassess my supplies, as my brushes are in bad shape and maybe I should have two palettes going in order to do portraits one day and the 6x6"s the next.
When I was working on portraits in the studio almost 2 years ago, I was using a very large palette with A LOT of colors, and some pre-mixes so this sketch type of portrait work uses fewer colors.

If you want to read about the Stapleton Kearns workshop, go to my adventures page.  That is also where you would see my recent Italy trip.

Finally on the home stretch with the mural!

This past week I finished the video end wall and the area over the sales area where the DJ stand is also located.  
It's not finished in this photo.  More photos will follow later.

I started the long wall the was the original reason why this project began.  Imagine that.  
As I probably mentioned in a recent blog, I lost my original drawing and had to make another one. Basically it's a view of space with lots of planets, dragons, a castle, etc.  I started by creating a foreground area 31" up from the floor by painting a middle gray upon which I will paint rocks, valleys, mountains, cliffs, a volcano, craters, etc.  The 31" is only to get something to gauge the space by.  Next I began to work on the big dragon.  We have a big dragon there from previous mural designs and the kids always want us to keep him.  I'm making the wings and tail much bigger.  Here is the way he was before:


He will have UV paint over the colors I have painted him.  
I'm not sure how successful this will be because the UV paint 
should be painted over white to get maximum effect.
Here is where he is now but he's only half done.
I may change the shape of his tail.  I won't know until after I do the shading and put some scales on it..  You can see the gray 31" underpainting for the foreground along the bottom.
Here are some of the drawing procedures.
You can see the original wing if you look closely.

Saturday, October 22, 2016

Video end of the rink - wall - mirror ball

October 21, 2016
Mirror Ball
This week I concentrated on the mirror ball.  This photo was taken with the UV lights on.  The next thing will be the beams coming off the mirror ball and I found my laser level and aimed it at the wall and that will be a good way to draw my lines.  After that, I'll hit the yellow outlines here and there on the silhouettes and do a little other touch up and I'll be moving on the THE BIG EXCITING SIDE WALL!!!!  Still trying for a xmas deadline, what do you think?  Will I make it?
Stapleton Kearns
Next weekend I'll be working for three days in a workshop in Lyme CT, plein air with Stape.  This will be a challenge, watch it snow or something.  :)
Other art this week
Yesterday I made my annual pilgrimage to Cyclorama's 20th Anniversary Boston International Fine Arts Show, pretty much an annual affair for me and my friend Ed Lemay--then we had dinner at MFA and saw the current exhibit http://www.mfa.org/news/william-merritt-chase and this morning I went to the church where I used to paint portraits twice a month.  I'll be rejoining the group in November.

I also sat for my portrait this week with the wonderful Mark Hayden C.M.  It looks fantastic already!  Mark painted a portrait of my husband, George, that I appreciate every day.  I thought it would be good to have the set to pass down to Mr. Marc. In the meantime, it will be good company for George :)

Sunday, October 16, 2016

Video end wall, last week and this week

After taking a break in the progress, I was hard at work last week and was able to finish the lower portions of the end wall where the video screens are.  This week coming, I'll work on the top section.
Here are some photos, realize that some are taken with white lights and then with UV lights.
The light you see is not a light it's the paint under UV light.

First past of the end wall in progress under both white and UV lights

Finished section, you can't see the yellow for some reason, my phone doesn't take great photos.

This is how it looks under white light.

This is how it looks under UV light. It looks better in person.  You still can't see the yellow.

Tuesday, October 4, 2016

Kim English Workshop, end of September 2016

I'll be attending the week-long workshop in Gloucester, Ma. with Kim English.  It promises to be a grueling art boot camp.  Why do I do this to myself?  Anyway, to get the gory details, go to my adventures blog.

Otherwise, the current news is that I'm still working on the mural at the rink, and expect to be finished now around Christmas, let's hope.  I haven't been there much lately because of all my travels, but last Sunday I was there for 5 hours and got a little bit done.  I took some photos and will post them soon.   

Wednesday, September 21, 2016

Home Again

My 2-week painting vacation in Italy is over and I'm already gearing up for a workshop coming up this coming Monday in Gloucester, MA with Kim English.

You can read about my Italy trip and see pictures on my Adventures blog.  I'll be adding some content and more photos soon.  I posted to this blog with my iPad while I was there and it is an app that does not have the full capacity to edit that the desktop version has.  I like to edit photos before posting and I also like to vary the text.  I was in the Venice area of Italy while a nearby city was hit with an earthquake. I know the area and realized how extensive the damage was.

Kim English is a favorite of mine, and from what I understand, we will be doing a lot of figure work.  He usually has figures in the landscape.

What I should be doing is working on my murals at the rink.  I started that project when it was too cold to put paint on the walls, and it looks like I'll be finishing under the same conditions.  :(

Wednesday, August 17, 2016

Leaving soon for Italy

I'm getting pretty excited about my upcoming art trip to Italy.  I'll be blogging on my adventures blog:  www.pyche-art.blogspot.com.  I haven't blogged for so long, I hope I can remember how.
The adventure starts Monday, the 22nd, at Logan Airport.

Monday, February 8, 2016

Happy New Year Art Friends

Wow, I know, you haven't heard from me in a long time.  I am fine but just not producing many finished paintings.  Nothing to talk about I guess you would say--except "Hello" to all of you, and I'm happy thinking that I'll soon be blogging again.

I am heading to Italy again this year and my side-kick, Carol, isn't going because of a different trip to Europe with her family---SO there is one (female) spot left IN CASE YOU WANT TO GO.
Painting in Veneto, Italy, Trip #1 Aug 24 - Sept 6, 2016
The area we will be staying at is about an hour from Venice, and for the first time, not in the mountains.  I'll be pleased to answer any questions you may have about the details of this trip by email.  Margaret's trips are the most amazing, totally well-planned and inexpensive, all inclusive (mostly, except sometimes the wine).  We usually paint every other day and tour the rest of the time.  I have blogged about all my trips with her, either on this blog or my adventures blog in case you want to look back to find those postings.  There is some instruction or you can be on your own.

Update:  I am still preparing to start my mural project which, so far, is going ok.  I'll start to blog about it once it gets underway.  I'm not sure whether I should think of it as "daily" art or an art "adventure".  Any comments on that?