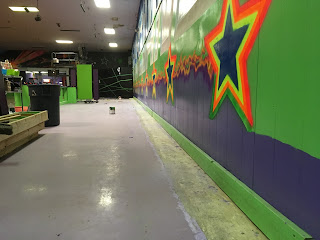
Saturday, December 24, 2016

Sorolla (a gift) and where I am now on the wall


Here is a beautiful show of paintings of Sorolla which I'm sending as a little Christmas token.

I've stopped for the holidays and my vacation cruise and pushed to leave it in some sort of respectable shape for the customers who come during the Christmas school vacation.  The underpainting, except for the bottom area of the dunes which will have rocks and maybe Martians, is almost done and the UV paint is done on the right end of this section.  I had to put the staging away so some highest points are not completed. I am anxious to return and paint UV on the dragon and paint the flames he's breathing out.  Painting flames with transparent paints is what makes flames look so good, but this UV paint is not transparent which presents some serious challenges.
Progress as of end of December 2016

Wednesday, December 14, 2016

Working from right to left on long wall

This week I did a couple more primer coats on the dragon's fire and primed the first couple of things along this long wall.  I wanted to start to paint the UV paint on the dragon's fire but realized just in time that if I did that then the only thing that would show up with the blacklights on during a session this weekend would be the dragon's fire but you wouldn't see where it was coming from, so in order to paint the flames I first need to paint the dragon.  In light of this, I decided to start on the right and move towards the left finishing approximately 30 feet at a time.
Meanwhile Marc worked on the new area for video games and birthdays.  He had to grind the cement where the bench had been (remember from my previous blog that we tore down the bench).  There was a lot of work involved, even putting down the new urethane coating was harder than usual due to it being thicker and harder to apply.  There are UV chips sprinkled on top.
Bench was were the blue is since that section needed two coats of urethane.
This is the finished beautiful new floor with the UV chips in it.
When I came in the next morning after the grinding, there was tons of very fine dust all over the main floor (and everything else most likely) I had to dry mop it twice and wet mop it finally to get it up.
Here you can see the cement dust where I didn't clean it up.
Primer coat is the white in this area.
First thing this morning (Wednesday) I unloaded my carts and reorganized everything.  Over the past 9 months I've worked with these carts and everything was helter skelter.  I managed to return some paints and materials to storage since I'm on the home stretch now and can thin out my inventory.
Beginning to paint with blacklight (UV) paint on the planet.  In this photo both the
white lights and the UV lights are on.

In this photo only the blacklights are on.  My camera doesn't take the best pictures.

Thursday, December 8, 2016

Last wall - this week's work

Sunday night
Met with Marc and figured out the positioning of the video screen and the size. 

Monday
Resized the video screen after painting the first coat of primer because it was smaller than ideal.
The ratio must be 9:15 and now the new size is somewhere around 10 x 20.  So I measured, taped, put on two coats of primer. and did some positioning of the graphic design on the wall.

Tuesday
Put one final paint coat on the screen, but it needs another coat.
Put up more underpainting and designing of the first section of the wall mural.
There is a large planet with a small planet at it's edge and an orange circular explosion thing.
The shape of the hills below have been changed somewhat.

Final coats on the video screen and more underpainting of the mural design.
Wednesday
Put the final coat on the screen, so 2 primer coats and 2 top coats.
Did more redesigning of the first section of the wall mural and more underpainting.
Washed a section of the first end wall that I had painted last spring where a bench had been and is now removed.  The section under the bench is now revealed and 80' was scrubbed, washed, and painted.
More touch-up paint in that area.
Some of this original design will be covered by large video redemption game machines in another month or so.
After bench was removed, wall was washed

Wall was painted purple.  Floor in  this area will have blue urethane floor with green UV chips.

Thursday, December 1, 2016

Ready again for the last long wall.

Before I start, I'm looking into vinyl signs for those skater logos that I can glue to the outside wall.  Still trying to figure that one out.

It is settled that one large video screen will be close to the middle of that wall.
View of the long wall now.  Three things are on it, a space station, a castle, and a dragon.
I am glad about that because two screens would take up most of the space (you can see part of one of the screens to the far right of this photo) and make any real sense of a space design fairly impossible to achieve.  This center screen will cover the beloved castle (which looks like a dot on that wall on this picture) that has been a element of that wall through a few other renovations, but I'm going to move it and use it again!  The decision of where to put it took a while, but at least it can be squeezed in.
I did a quick loose drawing and colored it in with markers, not the best for actual colors or values, but it's something I can go by.

  • The dragon, whose wing looks like a purple smoke stack, is breathing fire
  • To the left of the screen you can make out some lightning
  • Beside the lightning is the castle
  • The old space station is visible at the far left.  It blocks out the planets I'm trying to feature.

There is a space station left over from the previous design that I was thinking of keeping, but now I'm not that sure.

So I traced the present castle and will transfer that drawing to the new location.